
There's no shortage of good reasons to add images to your WordPress Premier website. They can increase the visual appeal of your posts to better engage users, emphasize your personal brand, and even strengthen your SEO (search engine optimization) efforts if you play your cards right.
On the other hand, using them improperly can create problems.
The most common mistake we see agents make is uploading very large images. This can slow down page load times, making for a bad user experience and potential loss of traffic.
A less serious but still common problem is that agents can miss out on the full benefits of images simply because they don't follow SEO best practices.
Let's go over some ways to make sure your images are working for you.
What's the best way to have images added to my site?
Sometimes the easiest thing and the right thing are the same. The best way to handle images is to let us handle them for you. Simply send us the image and describe its purpose and where you'd like to see it on the site, either by using our Submit A Photo, PDF or File form or by emailing us directly at premier@engageremarketing.com. We follow all of the best practices we outline here. This way, you don't have to worry about resizing or cropping your image, or about the alt and title attributes - we'll take care of everything.
Submitting your image updates to us is far and away the most effective way to get images implemented on your site the right way.
If you still want to add images to your site yourself, read on.
How do I make sure I'm uploading images at the right size?
Good things come in small packages. To prevent delays in page loading speed, you should not include any images with excessively large file sizes on any of your pages or posts. If you think "excessively large file size" sounds a little bit vague, you're right. There is no universal right answer when sizing your images, but at engageRE, we aim to optimize images so that even the very large images on our sites do not exceed a few hundred KB (kilobytes). If you don't know how to determine the file size of an image, consider checking out one of these articles from around the web:
- How to View Information About Files and Folders in Windows 10
- How to Get the Size of a File or Folder in Mac OS
High-resolution images straight from stock photo companies or cameras typically have very large file sizes (multiple megabytes large; 1 megabyte = 1,000 kilobytes). Such large images can seriously hinder your page speed. While WordPress has options for automatically resizing and cropping photos that will cut down the size to a much more reasonable level, and some of these may trigger automatically, it's best not to rely on these options. Even with those tools, it's still very possible to inadvertently put the full-size image on your site. So we strongly recommend that you optimize your images before you upload them.
Optimize? Who? What?
To optimize an image simply means to reduce its file size. There are many tools out there for sizing and optimizing images. Photoshop, for example, is a great tool for manipulating images, including reducing file size - but it's not free. You may be more interested in free, easy-to-use, web-based tools. The examples below can be used whether you've got a Mac or a PC.
As important as it is to optimize and compress images, it's also highly recommended that you reduce the dimensions of the image. This helps decrease the file's size, and ensures that you're not adding images to your site that are larger than what you really need. Here are some free online tools that will work nicely for that purpose.
Alright. But what's this I've been hearing about "alt text" and why does it matter?
When it comes to putting images on your website, probably the main thing you're thinking about is users who can actually see the image. But what about users who can't, such as the visually impaired? Or what about search engines? They're just programs - they don't have a sense of sight. How can you make your image "visible" to those who can't actually see it?
That's where the "alt text" (or "alt tag") comes in. "Alt" stands for "alternative" - it is a text alternative to your image that can be useful for visually impaired users of your site. As a bonus, it helps search engines understand your images too, which is a potential SEO advantage.
WordPress makes it easy to add this text to any image. From your WordPress media library (which you can access by clicking the "Media" item in the sidebar on your WordPress back end), click on any image and you will be presented with the Attachment Details screen for that image. Here, you will see a box labeled "Alternative Text". Simply enter your text there.
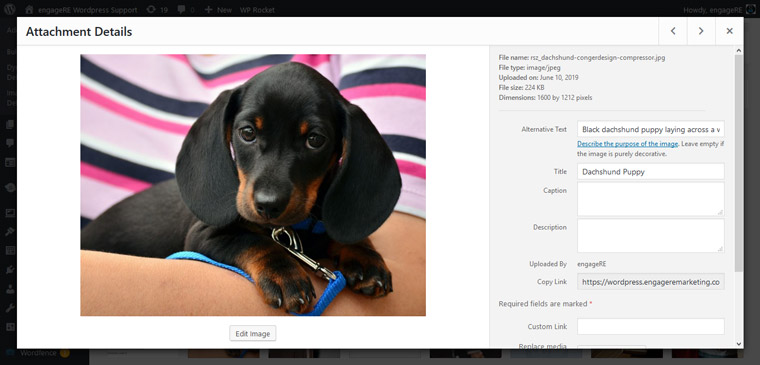
The alt text reads, "Black daschund puppy laying across a woman's arm." The title reads, "Dachshund Puppy".
As WordPress advises you, you do not need to add alternative text to any image which is purely decorative.
Alternative text should be detailed enough to give visually impaired users an idea of what's contained in the image, but it should not be overly long. If possible, it's a good idea for SEO to include keywords or text which is relevant to the main subject of your article or page in your alternative text, but don't force it - remember that your main priority is to actually describe the image. Visually impaired users will probably not appreciate a graphic being described as "real estate homes for sale properties call Noel Jenkins at 800-555-5555 today best real estate agent."
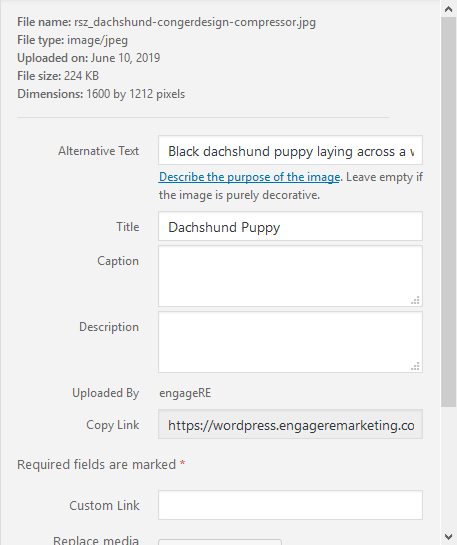
What about the "Title" field?
You'll notice that WordPress gives you a few fields in addition to Alternative Text, such as Title, Caption, and Description. It's not particularly necessary to fill out the caption and description (though it is unlikely to harm anything if you do), but we do recommend using the Title field to briefly identify your image. Generally, this should be more succinct than your alt text and simply be enough information to broadly describe the image or its purpose. It isn't as crucial as alt text is, but it will display when users hover their mouse over the image, and it is used as an internal identifier in your WordPress site builder.
Is that all I need to know to make sure I'm adding images to my site properly?
Honestly, not really - it's just an introduction. For best results, it's still highly recommended to contact us for all your media needs on your WordPress Premier website. When it comes to adding images to sites in the best way possible, there's a multitude of different factors that come into play and if you're not a professional web developer or graphic designer, you can't expect yourself to know all of them. Taking advantage of our full-service site update offering is the best (not to mention easiest) way to make additions or updates to your site, and this is all the truer when images are involved.